Pinterest

February 28, 2013

one button rope bracelet with wood barrel beads 2666

 The one-button design is as versatile as there are materials available...this one is made with 3/16" cotton braid for the framing cords, some bright white nylon braid, and two lengths of hand dyed tan cotton cord.


Tutorial "how-to" click here.


 The center is a row of variegated color but regular shaped wood beads obtained at the store. See the previous post for the latest on DIY paper beads used in these bracelet designs.

The white nylon highlights the warm color of the wood. The tan cords give this a nice earthy color.
Size is a "medium" about 7 1/2" (191 mm) inside circumference.

                         Available here


design and photographs © copyright 2013 WhatKnotShop

February 27, 2013

one button bracelet with paper beads 2667

 Another of the very simple one button bracelet designs made with cotton cord. The variation on this one is the use of handmade paper beads in the center. You can see the distinctive layered pattern in the close up photos.

Read the tutorial showing how to make the one-button pattern here.

The paper beads are used the same way that glass or ceramic or wood beads might be used. The difference is that each bead is actually unique.
 The subtle variations in color and size give this bracelet a more variegated vibe. The bead colors tend towards gray with little bits of color here and there.

Those of you familiar with the making of paper beads know that it's a wet process using strips of paper and an acrylic glue-sealant material. The beads are made, let dry, re-coated several times and finally are ready for use.

This group was made in my studio using white glue as the adhesive and later coated with acrylic.
Here's a good look at some of the texture created by the laminating process.

The beads are much lighter weight than glass but work into the weave in much the same way.

                Available here

design and photographs copyright 2013 WhatKnotShop

February 26, 2013

soft bangle with beads 2660

 Soft cotton hand dyed cord scraps and a few glass beads are used to build this casual slip-on style bracelet. Unlike the one button designs this one is a "squeeze to fit" bangle measuring a generous 8 5/8" (219 mm) inside circumference.

One 12 mm lavender glass bead and five smaller red beads are tightly integrated in the fabric.


This is the latest in a series of similar designs:

green fiber bangle bracelet with beads 1448

cotton fiber bracelet red & orange with beads 468

three new )strata( designs

orbit beaded soft bangle bracelet grey design )strata( 631

orbit beaded soft bangle blue design )strata( 630
Colors are brown, rust, natural, scarlet, with a verdigris accent.


design and photographs copyright 2013 WhatKnotShop

February 21, 2013

hardware cloth bracelet with beads 1478

 Conceptual bracelet made with green vinyl coated hardware cloth and red glass beads.


Slip-on bangle style design.

Garden chic, garage fashion, farady cage grunge.


 Glass beads have very small holes enabling the wire to be crimped over to hold them in place.

Could be made to size with 1/2" increments.
Size "medium" 7 5/8" (194 mm) no stretch to this one, it's made of coated steel.


design and photographs © copyright 2013 WhatKnotShop

February 19, 2013

blue beaded two button bracelet 2630

 This one has nothing to do whatever with knotting per-se but appears here anyway as an exercise in beadwork. The glass beads are a random collection predominantly reds and oranges but with a few blue and green and a couple of black opaque beads too.

In the correct lighting the beads glow with color as you can see in this photo. It's a nice effect.
The cord structure is very similar to the one button fabric bracelets. The framing cords are a 1/4" braided nylon hand dyed blue with two buttons and loops. Instead of edge binding the cords as infill the beads are placed between the framing cords and threaded on the four ply nylon. You can see the exposed stitching on the outside edges.
Size is medium-small measuring 7 1/4" (183 mm) inside circumference when closed.


                 Available here


design and photographs © copyright 2013 WhatKnotShop

February 17, 2013

beaded grey suede pillow bracelet 2654

Another variation on the Nigerian design leather toggle bracelets. This one is made with a soft grey suede, a row of clear glass beads and a modified champaign cork used as a button.

This one measures about 8 5/8" (219 mm) inside circumference but it is extremely flexible and soft.

Here's another similar design you might like.

Available here
 Black waxed thread is used to detail the loop and is also used to create the seam. The beads are plain sewn into the seam and then the assembly is turned inside out to conceal the edge of the material.

The cork is glued into place using rubber cement. This is a high-tech shortcut that indigenous creators of the original designs would never have used. They would not have had these finely made glass beads either...artistic license.
Stuffed with polyester batting the loop flap is then stitched closed to form the opening that receives the button.

I call these pillow bracelets due to their oversize profile and soft texture.

More Handmade Artifacts can be found in the Etsy Shop ArtifactSite.

design and photographs © copyright 2013 WhatKnotShop


February 16, 2013

overhand knot cotton cord bangle bracelet 2645


This is a new design that combines a simple overhand loop knot with edge binding technique to make a soft bangle style rope bracelet.

3/16" cotton line is wrapped around an 8" mold and a series of overhand knots are placed in the center.

Here you can see the two part braided pattern clearly.


The whole assembly is edge-bound together using  waxed nylon thread.


Here's another view of the braided pattern.

Size is 7 7/8" (200 mm) circumference.

                Available here


design and photographs © copyright 2013 WhatKnotShop

February 15, 2013

blue beaded one button bracelet 2653

 Mixed cotton and nylon cords set off the blue glass beads in this one button design. The framing cords are a 1/4" cotton braid creating a slightly thickened edge.


Size "small" 7" (178 mm) circumference.
 Blue glass beads catch the light.


To see a tutorial showing how to make this type of bracelet click here.

The loop and button detail.


  Available here


design and photographs © copyright 2013 WhatKnotShop

February 13, 2013

two button cuff bracelet with black glass beads 2641

 The third in a series of cuffs assembled from pairs of one-button rope bracelets featuring different types of beads. This design is the widest of the three with a center of 12 mm black glass beads. The contrast between the bright white, ecru, and grey fabric and  the solid dark glass beads creates visual drama.

Read the tutorial here showing how to make the one button bracelets.
 The framing cords are 1/4" braided line which creates a solid edge and provides a place to stitch in the beads. The buttons and loops are easy to pop open if you have really big hands, this is a big cuff measuring 8 1/2" (211 mm) inside circumference so you may be able to just slip it on over your hand instead. Here are the other two like this:

two button ribbed cuff bracelet with wood beads 2644
two button rainbow bead cuff rope bracelet 2643

The edge binding makes the cord fabric stiff enough to hold it's shape. The nylon thread keeps a tension on the fabric and you can see the little dimples where it is placed along the edge of the framing cord.


Available soon in my Etsy shop


design and photographs © copyright 2013 WhatKnotShop

February 12, 2013

extra wide two button ribbed cuff bracelet with wood beads 2644

Here's another cuff made with the edge binding system from cotton cords and a string of wooden beads. The design uses two one button bracelets made with the same colored cords and adds the 10 mm wooden beads in the center.

Read the one button bracelet tutorial here to see how the pieces are made.

In this bracelet the framing cords are 1/4" line which is thicker than the infill cords and creates a series of ribs.

 Here you can see the dimples made by the tensioned edge binding thread.

The wood beads are stitched in between the ribs after the two one-button segments are complete using the thickness of the framing cord to hide the stitching.

Here's a design without the thicker framing cords
two button rainbow bead cuff rope bracelet 2643
I think the ribbing adds a nice definition to the edge of this cuff. The single grey infill cord sets off the more earthy brown of the beads.


Available here


design and photographs © copyright 2012 WhatKnotShop

February 11, 2013

two button rainbow bead cuff rope bracelet 2643

 This design is actually a pair of one button bracelets made from the same batch of infill color cords with the center seam filled with a row of brightly colored 10 mm glass beads.

This tutorial explains how to make a one button rope bracelet. 

Here are some other designs:
Grey and white one button rope bracelet 2635
Simple one button rope bracelet 2577
 The beads are stitched in using a piece of four ply nylon thread which is embedded in the framing cord at the edges, invisible in these photos though.

Made on an 8" mold this bracelet is about 7 7/8"  (200 mm) inside circumference. There is some shrinkage due to the compression that occurs with the edge binding process.

Measures about 1 7/8" (48 mm) wide.
The loops are made from the framing cord, buttons stitched in place on the gather end of infill cords using nylon thread.


                      Available here.


design and photographs © copyright 2013 WhatKnotShop

February 10, 2013

two part rope bracelet with breads 2642

 This is the simplest turks head knot you can tie, just two parts wrapped around and laid out flat instead of bunched up. This pattern is somewhat unstable as the strands are not naturally positioned as is the case with the three part braid.

The secret is hidden.

Here's a similar you might like design made without beads.
There is a piece of four ply nylon thread placed at each crossing point. This edge binding holds the strands together in a nice parallel pattern and also holds those clear glass beads you see in the space between the parts.

The rope material is a 3/16" braided cord. Notice the overlapping ends also secured with the nylon thread.
Made on an 8" mold this bracelet measures about 7 3/4" (197 mm) inside circumference.

                Available here


design and photographs © copyright 2013 WhatKnotShop

February 9, 2013

soft suede toggle bracelet 2648

 This design is based on the traditional Nigerian african leather bracelets. This one is made with a skin of leather and stuffed to make a big soft pillow like bracelet.

The outside is a piece of brown suede that has been stitched together with waxed cotton thread. The closure loop was reverse stitched on a sewing machine and turned inside out to conceal the seam. The ends were bound together to close the loop.
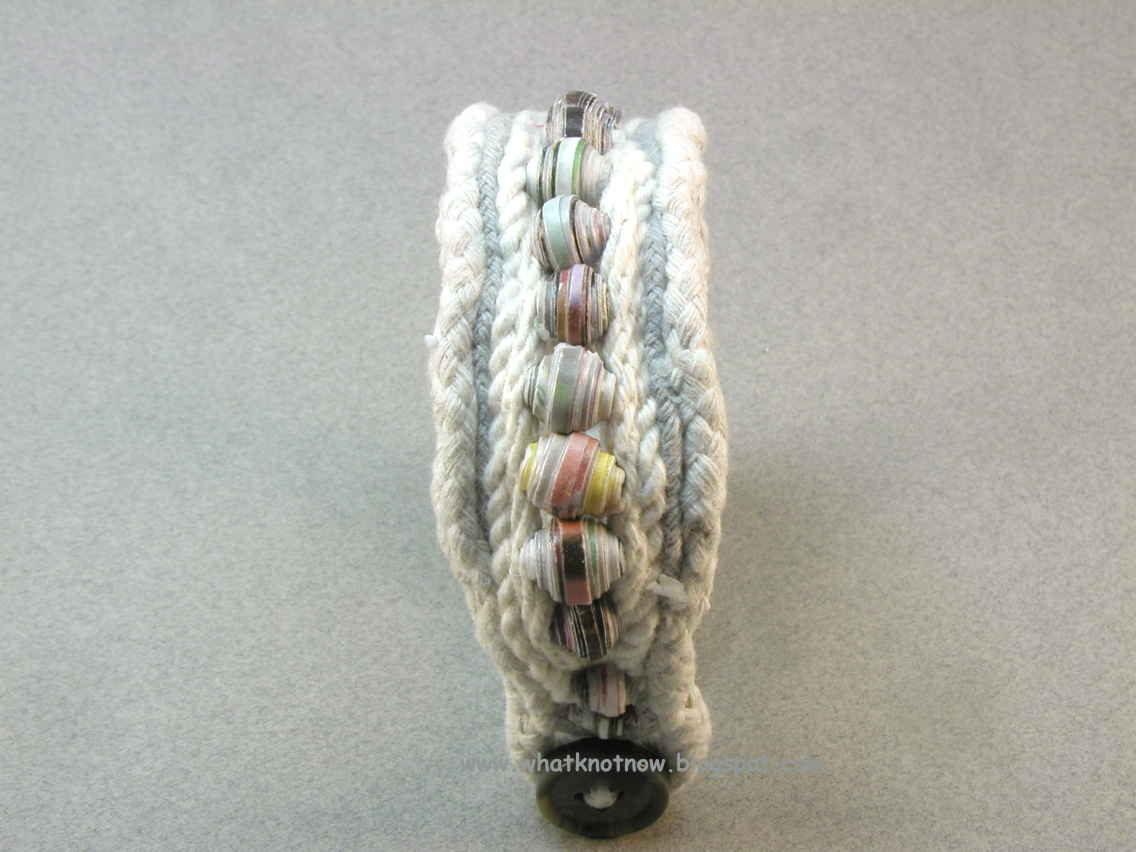
 The closure button is a cork that has been carved to make a tapered plug with a button end. The cotton binding thread holds it in place.

The stuffing is polyester quilt batting inserted through the plugged end of the bracelet and packed in place with a chop-stick.

This bracelet look oversized but is featherlight and extremely comfortable
The inside circumference is about 8" (203 mm) but this design has a very soft quality and will compress slightly.

If you are interested in this design please leave a comment.


design and photographs © copyright 2013 WhatKnotShop

February 8, 2013

Green and white beaded cuff bracelet 2629

This is another in the series of one button rope bracelets made from up-cycled cord segments, a few beads and some cotton floss. The basic assembly is the same as this tutorial but with a few extra embellishments.

This design is a bit wider about 1 5/8" (42 mm) and has a double row of glass beads in the fabric. The edges are wrapped with cotton floss. The framing cord is made from cotton piping which is very soft and easily damaged.
 The floss is placed after the cords have been compressed so the shape and size is established.

The colors are muted sage and blue. Beads are green and blue. The white nylon cord is a recycled shopping bag handle.

More one button designs here:
Simple one button rope bracelet 2577
black and blue one button rope bracelet 2616
And a more over-the-top design here:
Grey and white two button beaded tribal cuff 

The floss is used here to reinforce and protect the button loop. Size is a large medium measuring 7 3/4" (196 mm). This was made on an 8" mold.

                  Available here

Visit the fiber art section of my Etsy shop to see more of these designs.

design and photographs © copyright 2013 WhatKnotShop

February 5, 2013

grey and white one button rope bracelet 2635

This one button bracelet was made from cotton cable cord and two segments of hand dyed grey braided clothesline cord. The construction technique is shown starting with part one of a seven part tutorial.

The heavier braided cord forms a small ridge detail in the center. The edge binding holds this bracelet together with the residual tension in the nylon thread.
 Here you can see the tiny dimples formed by the edge binding thread.

The framing cord in this design is a piece of cotton cable cord which is the same thickness as the infill cords so the result is a low profile edge condition.
 Here you can see the stirrup loop formed by the framing cord.

This is a size "medium" 7 3/4" (197 mm) inside circumference. This was made on an 8" mold and shrunk about 1/4" during the binding process.

                    Available here


design and photographs © copyright 2013 WhatKnotShop

February 3, 2013

one button tutorial part 7 finishing the bracelet

Finishing:

Here you can see the progress tensioning the cross-binding thread. Each side loop is tensioned in turn against the framing cord and cable tie.

In this picture you can see how to insert the crochet hook under the cable tie. As the nylon binding thread is drawn through the bracelet width will diminish as the infill cords are squeezed together.
 When you have tensioned the cross-binding thread all the way to the end use the extra thread to reverse-stitch back down the opposite direction. This adds some additional strength to the binding and enables you to smooth out any lumps that may have appeared.

Hint: You will want to use the small pliers as the cord fabric will be dense and hard to penetrate.
After you have buried most of the nylon thread use the diagonal cutters to snip off the remaining  nylon binding thread. The reverse stitching will lock the binding thread in place so there is no need for knots or tie offs.
Pop the bracelet off the mold and examine the interior. There should be no cross stitching visible! (practice makes this better)

The finished bracelet will shrink slightly from the mold size due to the compression of the cords during the binding process.

< back to part 6
< back to part 1
design and photographs © copyright 2013 WhatKnotShop

February 2, 2013

one button tutorial part 6 tensioning the cross bindings

 As you work around the mold you will notice that the amount of slack may vary in the center infill cords. To make the fabric come out even place the edge binding stitches but leave them loose with a small loop on each side as shown.

Use your thumb to keep the infill cords flat and even as you place the cross-binding stitches. You may need to crush some of the softer infill cords together to make them fit.
 Here the cross-binding of the infill cords has been completed with everything left in a slack condition.
 Place a nylon cable-tie in the small loops on each side as shown. They will be gradually withdrawn as the loops are tensioned.

The purpose of the cable ties is to hold the small thread loops open so they don't get buried in the framing cords during the tensioning process.

Use a crochet hook or other smooth object like a chop stick to grab the small loop closest to the compressed area. Stretch the nylon thread to compress the infill cords. Start with the first loop and pull firmly to the side.

As you pull on the thread loop the cable tie on the opposite side will hold the next loop away from the framework cord so you can grab it easily.

< back to part 5          forward to part 7 >
design and photographs © copyright 2013 WhatKnotShop