Pinterest

Showing posts with label sailor bracelet tutorial. Show all posts

January 19, 2013

Placing the center strand tutorial part 3

 Continue the placement of the center cord all the way to the end.

The end is the place where the two outer strands meet.

In this photo the fid is approaching the end of the white outer strand. Pull it through all the way and remove the fid.

 Flip the knot over 180 degrees and re-attach the fid to the other long loose end of the center cord.

Place the fid between the two outer strands and draw the cord through to the opposite side in exactly the same way as before. Keep the cord in the center, no twisting, relaxed tension...
 Here you can see the path of the cord across the the knot following the center gap. In the photo the loops have been left slack to illustrate the overlapping pattern.

Continue to place the cord until all the crossings are populated and the colored cord arrives at the end of the white outer strand.
Here the placement is complete and you can see the parallel layout of the cords marked in red. Hide the overlap underneath one of the parts. Keep the cords side-by-side to facilitate the stitching together of the strands.

To see how the ends are kept from fraying and falling apart check out the stitch up tutorial

< back to part 2

design and photographs © copyright 2013 WhatKnotShop

Placing the center strand tutorial part 2

 Follow the center channel around the knot using the fid to place the cord between the two outside cords.

Don't cross over any cords, keep the center cord in the center between the two outer strands at all times.
 Place the cord and pull through to the opposite side. Keep the center cord as straight as possible try not to let it get twisted during the draw-through.

Leave the center cord relaxed, that is don't make it tighter than the outer cords. The whole bracelet will naturally tighten up as the voids in the weave are filled with cord.
Continue following the outer strands around the knot. Place the center cord between the outer strands but leave it in a relaxed (not tight) condition.

Here the loop is shown slack for clarity.


< go back to part 1      go forward to part 3 >


design and photographs © copyright 2013 WhatKnotShop

Placing the center strand tutorial part 1

This tutorial shows how to place a contrasting center cord in a turks head knot. Here are things you will need:

48" of contrasting color cord

pre-made Turks Head Knot bracelet - this example is a 12 bight x 5 part x 2 strand knot left in a relaxed shape  - read about how to make a rope bracelet here

wood fid - custom made out of 3/8" dowel
(If you don't have a fid you can use a ball point pen with a bit of tape over the tip to prevent ink stains.)


 Place the fid on the end of the center cord.

Find the end of the turks head knot and count 2 1/2 times around the circumference to locate the center. (5 parts divided in half = 2 1/2)

How do you know how many parts your knot has? Read Decoding the Knot to find out

Insert the fid in the center of the knot as shown. Spread the outer strands using the fid to create a path for the center strand.
Draw the cord through the knot at the center point of the turks head knot until an equal amount of center cord is on both sides.


                                    go on to part 2 >

design and photographs © copyright 2013 WhatKnotShop

October 23, 2012

11x4x3 tutorial part 3


Continue around the mold placing the cord OVER/UNDER on the left side and UNDER/OVER on the right side.

When you get back to the starting point you will notice that the first standing part and the running part are parallel and follow the same over/under sequence.

This indicates that the knot is complete!
You may follow the standing part around with the cord to "double" the weave and follow around again to "triple" the weave.

Carefully remove the excess slack as you go.

This shows the knot worked up to finished shape with three passes of the cord.

This pattern can be found in the Ashley Book of Knots #1342, page 239

Here's the finished product! See some design and color variations here.


< back to page two 

< start over page one 

design and photographs © copyright 2012 WhatKnotShop

11x4x3 tutorial part 2


When you get back to the starting point place the running cord UNDER the first standing part then OVER the second standing part as shown. Place the bight under the rubber band.

At the next intersection place the running part OVER the first standing part then UNDER the second standing part as shown. Place the bight under the rubber band, keep everything even and parallel.

Continue with the UNDER/OVER moves at the next intersection following the same sequence.
Continue with the OVER/UNDER pattern at the next intersection.

Adjust the position of the rubber bands to keep everything even.

< back to page one   forward to page three >

design and photographs © copyright 2012 WhatKnotShop

11x4x3 turks head knot tutorial part 1

This tutorial shows how to make an 11 bight by 4 part turks head knot out of 3 mm cord.
"Bight" is the place where the cord changes direction.
"Part" is the cord which is either "standing" (not moving) or "running" which is the live end.

Start with about 7 ft of cord. Make a three bight circumference of the mold placing the bights under the rubber bands as shown.

At the first overlap place the running end OVER the stationary or standing part as shown.


At the second overlap place the running part UNDER the standing part as shown.

Draw the cord though carefully and place the bight under the rubber band.
at the third overlap place the running part OVER the standing part as shown placing the bight under the rubber band.

The cords should be parallel and even.

                              go to page two >


design and photographs © copyright 2012 WhatKnotShop

November 18, 2009

Part 4, building a 13 part turks head knot bracelet - Adding more parts

This is part 4 of the tutorial:

Keep working the running part across the knot from side to side reversing direction after going OVER the last standing part.


bulk cord in white and hand dyed colors available here


Here the edge pattern is clearly established and visible.


Each time the running part crosses the first standing part be sure it is opposite the previous strand. If the previous strand goes over the parallel strand then pass the running part under. This keeps the over-under pattern intact.

On the outer edge the running strand must always emerge OVER the last sanding part. Work backwards to set up the over-under pattern to ensure that the last crossing is always OVER.

The open diamonds will get smaller as you add parallel strands. You will also notice that every other circuit around the knot appears to exactly follow the parallel strand on the opposite side of the diamond. This pattern will become clear as the number of strands increases bringing the parallel parts closer together.

< go to previous page                               go to next page >

November 17, 2009

Part 3, building a 13 part turks head knot bracelet

This is part 3 of the tutorial:

Move toward the right and again place the running lead UNDER the first strand, then OVER the second. Use the loop and gently pull the cord through.

Place the bight and "zig" to the left.

bulk cord in white and hand dyed colors available here

Work back to the left again using the same sequence but this time there will be two standing leads, place the running lead UNDER the third one and OVER the outside lead. Use the loop again and draw the cord through.

Completed rope bracelets available here

Here you can see the UNDER-OVER pattern at the outside left held in place with the rubber bands.

The cord leads to the right again...


...and goes UNDER the first standing part, then OVER the second one (just like before) using the loop to avoid tangling the long slack end.


At the outside on the left it's the same move again: UNDER the first standing part then OVER the outermost part.

We have 5 of the 13 parts placed now. The knot is complete for a five part diamond weave as you can see the over-under pattern is consistent even though there is lots of space left on the mold. We will fill that space up as the number of parts increases.

< go to previous page                                 go to next page >

Part 1, building a 13 part turks head knot bracelet in pictures


This is the second part of the tutorial:

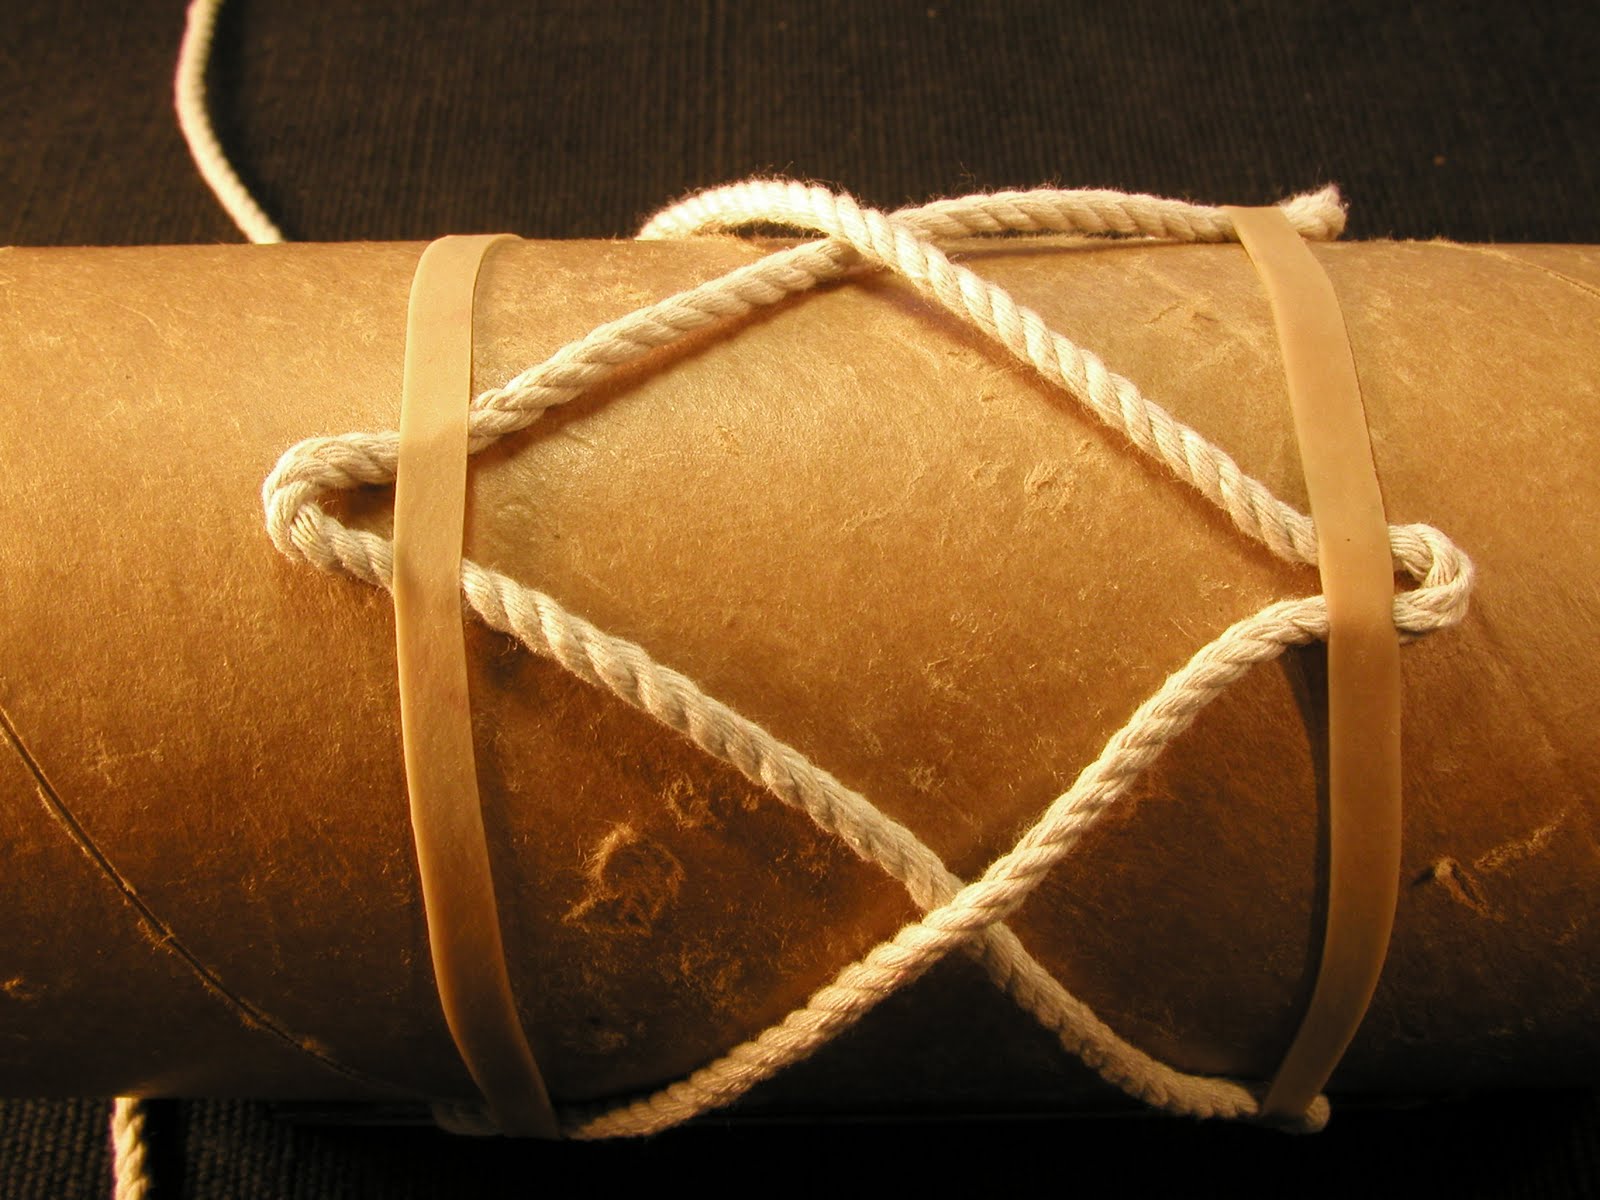
Unwind the cord and work out all the kinks so it is relaxed. Find the center of the cord about 15 ft from one end and place a loop under the left hand rubber band as shown.

(The rest can be coiled up and placed inside the cardboard tube)


roll the tube towards you and go half way around the tube and place another loop, (or "bight") under the right hand rubber band (on the opposite side)


bulk cord in white and hand dyed colors available here


keep going around the tube and cross OVER the first (standing) lead. Place a bight under the left hand rubber band opposite the existing bight on the right.


Here you can see the pattern clearly. Continue around placing new bights opposite existing bights. See how it creates a diamond shape?

When you get to the starting point, place the bight under the left hand rubber band placing the running lead OVER the standing lead.
Remember this move, you will use it to complete the rest of the knot.

< go to previous page                   go to next page part 2 >

need something easier? Try this four part design